Building your first theme
Mautic offers a lot of flexibility when it comes to creating themes.
As you learn more, you will be able to harness more and more of the benefits of custom themes.
Follow this guide to create a theme for a landing page, email, form, or all three!
Preliminary Theme Setup
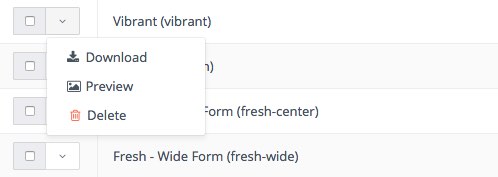
Download an existing theme from the themes section of your Mautic platform.
Once you expand the theme locally, you will already have a basic theme framework to work from.
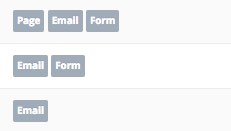
Determine what asset types your theme will feature.
Your options are page, email, and form.
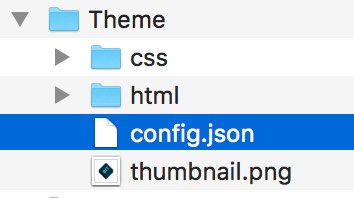
Locate and open the config.json file.
Give your theme a name, author, and your personal or company website.
Then, specify what asset types your theme will feature.
{
 "name": "Theme",
 "author": "Author",
 "authorUrl": "http://www.mautic.org",
 "features": [
  "email",
  "page",
  "form"
 ]
}
Place any images that will be included in your theme in a sub-folder directly within the theme folder.
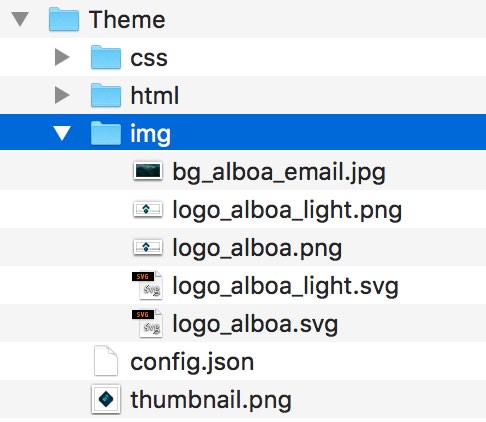
Place any other assets like font files or Javascript files in the theme folder.
Note: Using sub-folders is not necessary, but they help with organization.
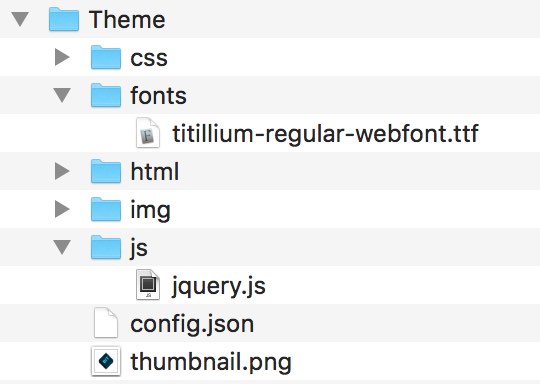
Create a 250px by 250px thumbnail.png file.
This will be used as your theme's thumbnail in the landing page and email editors.
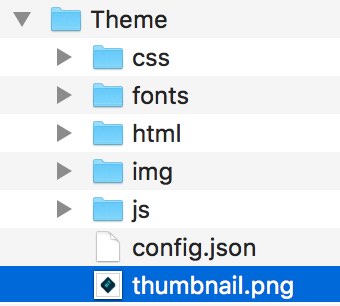
After you finish your theme's preliminary setup, you're ready to build your assets!
Building a Landing Page
Add "page" to the theme features in your config.json file.
"features": [
 "page"
]
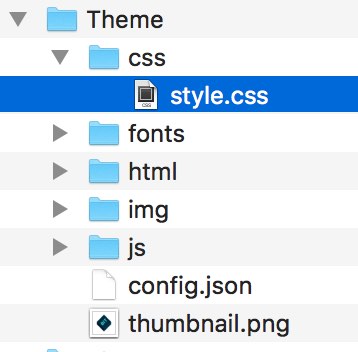
Create a CSS file within your theme folder. A sub-folder can help with organization.
If a CSS file already exists, determine whether you want to build off of that stylesheet or delete it and start fresh.
Setting Up the Landing Page "Base" File
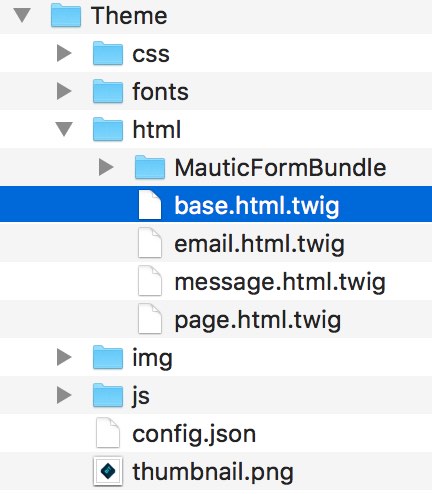
Locate and open base.html.twig in your "html" folder.
Locate the <head></head> tags. Place a link to your CSS file within the <head></head>.
<head>
 {% if page is defined %}
 <title>{pagetitle} </title>
 <meta name="description" content="{pagemetadescription}">
 <meta charset="UTF-8">
 {% endif %}
 <link rel="stylesheet" href="{{getAssetUrl('themes/'~template~'/css/style.css')}}" type="text/css">
<head>
Note: Be sure to use the shortcode above if you link to anything else within your theme folder
Place any other miscellaneous links within the <head></head>
<head>
 {% if page is defined %}
 <title>{pagetitle} </title>
 <meta name="description" content="{pagemetadescription}">
 <meta charset="UTF-8">
 {% endif %}
 <link rel="stylesheet" href="{{getAssetUrl('themes/'~template~'/css/style.css')}}" type="text/css">
 <script type="text/javascript" src="{{ getAssetUrl('themes/'~template~'/js/jquery.js')}}"></script>
 <link href="https://fonts.googleapis.com/css?family=Roboto" rel="stylesheet">
<head>
Note: Mautic will respect your theme's external links as long as they use HTTPS protocol (not HTTP).
Place any necessary meta tags in the <head></head>
<head>
 {% if page is defined %}
 <title>{pagetitle} </title>
 <meta name="description" content="{pagemetadescription}">
 <meta charset="UTF-8">
 <meta name="viewport" content="width=device-width, initial-scale=1.0">
 {% endif %}
 <link rel="stylesheet" href="{{getAssetUrl('themes/'~template~'/css/style.css')}}" type="text/css">
 <script type="text/javascript" src="{{ getAssetUrl('themes/'~template~'/js/jquery.min.js')}}"></script>
 <link href="https://fonts.googleapis.com/css?family=Roboto" rel="stylesheet">
<head>
A quick read about meta tags will help you determine which ones you want to include in your landing page.
Building the Landing Page "Page" File
Locate and open page.html.twig in your "html" folder.
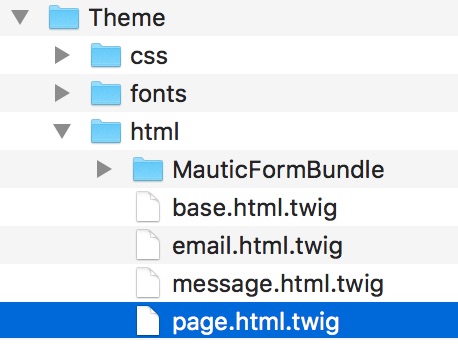
Develop the page as you would normally, but only include the HTML that would be within the <body></body> tags. This belongs within the {% block content %}{% endblock %} tags.
{% extends ":"~template~":base.html.twig" %}
{% block content %}
 <section class="hero">
  <div class="container">
   <div class="header">
    <img class="logo" src="{{getAssetUrl('themes/'~template~'/img/logo.svg')}}" />
   </div>
   <div class="main" >
    <h1>Take home your product today!</h1>
   </div>
  </div>
 </section>
{% endblock %}
Note: You can place the entire page.html.twig HTML inside the {% block content %}{% endblock %} tags in base.html.twig to preview your page locally in any browser. You will have to temporarily replace any shortcode links with relative links for the page to render properly.
Make sure you're using the correct shortcode for any asset that will be uploaded in the theme file.
<img class="logo" src="{{getAssetUrl('themes/'~template~'/img/logo.svg')}}" />Identify areas that will (or may) change each time your theme is used to develop a new page.
<section class="hero">
 <div class="container">
  <div class="header">
   <img class="logo" src="{{getAssetUrl('themes/'~template~'/img/logo.svg')}}" />
  </div>
  <div class="main" >
   <h1>Take home your product today!</h1>
  </div>
 </div>
</section>
Note: A safe move is to only choose text and images, so that users unfamiliar with HTML have no chance to break your page when they use the editor.
Wrap your chosen areas in <div data-slot="_"></div> tags, then wrap those tags in <div data-slot-container="1"></div> tags as shown below. The content within these tags will appear as default content in the page editor.
<section class="hero">
 <div class="container">
  <div class="header" data-slot-container="1">
   <div data-slot="image">
    <img class="logo" src="{{getAssetUrl('themes/'~template~'/img/logo.svg')}}"/>
   </div>
  </div>
  <div class="main" data-slot-container="1">
   <div data-slot="text">
    <h1>Take home your product today!</h1>
   </div>
  </div>
 </div>
</section>
Note: Text slots can function the same as image slots, and provide more flexibility.
Identify sections that you may want to rearrange or delete in the builder. Data slots must always be contained by these sections.
<section class="hero">
 <div class="container">
  <div class="header" data-slot-container="1">
   <div data-slot="image">
    <img class="logo" src="{{getAssetUrl('themes/'~template~'/img/logo.svg')}}"/>
   </div>
  </div>
  <div class="main" data-slot-container="1">
   <div data-slot="text">
    <h1>Take home your product today!</h1>
   </div>
  </div>
 </div>
</section>
Wrap each section in <div data-section="1"></div> tags, then wrap those in <div data-section-wrapper="1"></div> tags as shown below.
<section class="hero" data-section-wrapper="1">
 <div class="container" data-section="1">
  <div class="header" data-slot-container="1">
   <div data-slot="image">
    <img class="logo" src="{{getAssetUrl('themes/'~template~'/img/logo.svg')}}"/>
   </div>
  </div>
  <div class="col-md-4 offset-md-4 form-wrapper main-raised" data-slot-container="1">
   <div data-slot="text">
    <h1>Take home your <span style="color: #13BEBC">Bit</span>.</h1>
   </div>
  </div>
 </div>
</section>
Note: Any existing structural tag (not text or image tags) can be given a data-slot, data-slot-container, data-section, or data-section-wrapper attribute.
Congratulations! The landing page feature is now ready to be used in your theme.
Building an Email
Add “email” to the theme features in your config.json file.
"features": [
 "email"
]
Locate and open email.html.twig in your "html" folder.
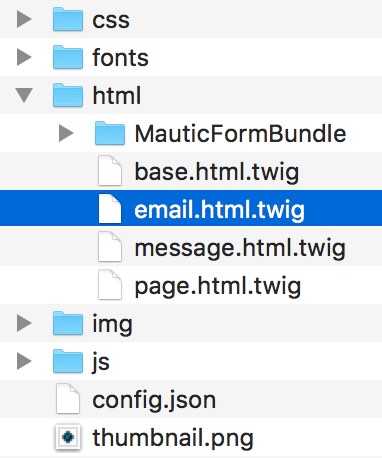
Locate the <head></head> tags. Place any necessary meta, style, link and title tags inside the <head></head>
<head>
 <meta http-equiv="Content-Type" content="text/html; charset=utf-8" />
 <meta http-equiv="X-UA-Compatible" content="IE=edge" />
 <meta name="viewport" content="width=device-width, initial-scale=1" />
 <title>{subject}</title>
</head>
Develop your email using best practices for email development.
Note: You can preview your email locally by opening email.html.twig in any browser. You will have to temporarily replace any shortcode links with relative links for the page to render properly.
Use the shortcode below to link to any asset within the theme.
{{ getAssetUrl('themes/'~template~'/assets/placeholder_logo.png', null, null, true) }}Note: The parameters set to null, null, true specify that the link path does not have a package name or version, and that the link is an absolute link. These must be included in any shortcode link within your email.
Identify areas that will (or may) change each time your theme is used to develop a new email.
<table border="0" cellpadding="0" cellspacing="0" height="100%" width="100%">
 <tr>
  <td align="center" valign="top" width="100%">
   <table align="center" style="max-width:660px;">
    <tr>
     <td align="center" valign="top">
      <a href="https://demo.com" target="_blank">
       <img src="{{ getAssetUrl('themes/'~template~'/assets/placeholder_logo.png', null, null, true) }}" alt="demo">
      </a>
     </td>
    </tr>
    <tr>
     <td align="center">
      <h1>Demo Email</h1>
     </td>
    </tr>
   </table>
  </td>
 </tr>
</table>
Wrap your chosen areas in <div data-slot="_"></div> tags, then wrap those in <div data-slot-container="1"></div> tags as shown below. The content within these tags will appear as default content in the email editor.
<table border="0" cellpadding="0" cellspacing="0" height="100%" width="100%">
 <tr>
  <td align="center" valign="top" width="100%">
   <table align="center" style="max-width:660px;">
    <tr>
     <td align="center" valign="top" data-slot-container="1">
      <div data-slot="image">
       <a href="https://demo.com" target="_blank">
        <img src="{{ getAssetUrl('themes/'~template~'/assets/placeholder_logo.png', null, null, true) }}" alt="demo">
       </a>
      </div>
     </td>
    </tr>
    <tr>
     <td align="center" data-slot-container="1">
      <div data-slot="text">
       <h1>Demo Email</h1>
      </div>
     </td>
    </tr>
   </table>
  </td>
 </tr>
</table>
Identify sections that you may want to rearrange or delete in the builder. Data slots must always be contained by these sections.
<table border="0" cellpadding="0" cellspacing="0" height="100%" width="100%">
 <tr>
  <td align="center" valign="top" width="100%">
   <table align="center" style="max-width:660px;">
    <tr>
     <td align="center" valign="top" data-slot-container="1">
      <div data-slot="image">
       <a href="https://demo.com" target="_blank">
        <img src="{{ getAssetUrl('themes/'~template~'/assets/placeholder_logo.png', null, null, true) }}" alt="demo">
       </a>
      </div>
     </td>
    </tr>
    <tr>
     <td align="center" data-slot-container="1">
      <div data-slot="text">
       <h1>Demo Email</h1>
      </div>
     </td>
    </tr>
   </table>
  </td>
 </tr>
</table>
Wrap each section in <table data-section="1"></div> tags, then wrap those in <table data-section-wrapper="1"></div> tags as shown below.
<table border="0" cellpadding="0" cellspacing="0" height="100%" width="100%" data-section-wrapper="1">
 <tr>
  <td align="center" valign="top" width="100%">
   <table align="center" style="max-width:660px;" data-section-wrapper="1">
    <tr>
     <td align="center" valign="top" data-slot-container="1">
      <div data-slot="image">
       <a href="https://demo.com" target="_blank">
        <img src="{{ getAssetUrl('themes/'~template~'/assets/placeholder_logo.png', null, null, true) }}" alt="demo">
       </a>
      </div>
     </td>
    </tr>
    <tr>
     <td align="center" data-slot-container="1">
      <div data-slot="text">
       <h1>Demo Email</h1>
      </div>
     </td>
    </tr>
   </table>
  </td>
 </tr>
</table>
Note: <table>, <td>, and <div> tags can be given a data-slot, data-slot-container, data-section, or data-section-wrapper attribute.
Congratulations! The email feature is now ready to be used in your theme.
Building a Form
Locate and open form.html.twig in your "html" folder.
Note: form.html.twig can also be copied from app/bundles/FormBundle/Views/Builder/form.html.twig in your Mautic platform.
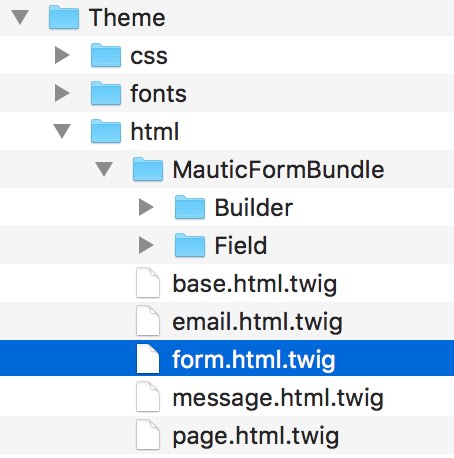
Add/edit any HTML structure within {% block content %}{% endblock %} that you want included in all forms under this theme
{% extends ":"~template~":base.html.twig" %}
{% block content %}
 {% if message is defined %}
  <div class="well text-center">
   <h2>{{ message|raw }}</h2>
  </div>
 {% endif %}
 <div class="form-container">
  {% if header is defined %}
   <h4>{{ header }}</h4>
  {% endif %}
  {{ content|raw }}
  <a href="/privacy">Privacy Policy</a>
 </div>
{% endblock %}
Any field type of a form can be modified by bringing its PHP file into the "Field" folder under "html" in your theme.
Locate any file from app/bundles/FormBundle/Field in your platform, and copy it to the "field" folder in your theme.
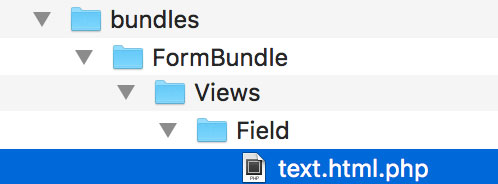
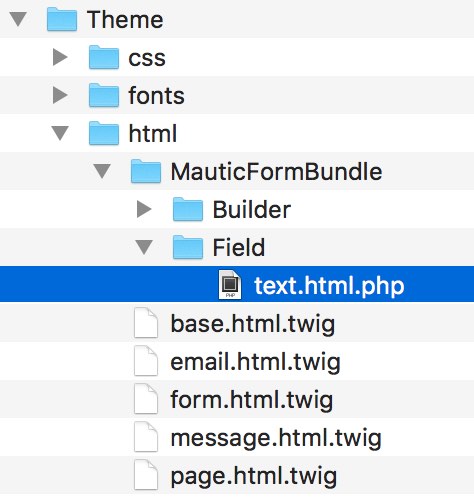
Add/edit any HTML structure that you want included in all form fields of this type within this theme.
if ($containerType == 'textarea'):
$textInput = <<<HTML
 <textarea $inputAttr>{$field['defaultValue']}</textarea>
HTML;
$label = (!$field['showLabel']) ? '' : <<<HTML
 <label $labelAttr>{$field['label']}</label>
HTML;
Locate style.html.twig in html/MauticFormBundle/Builder.
Note: Style.html.twig can also be found in app/bundles/FormBundle/Views/Builder/style.html.twig in the platform.
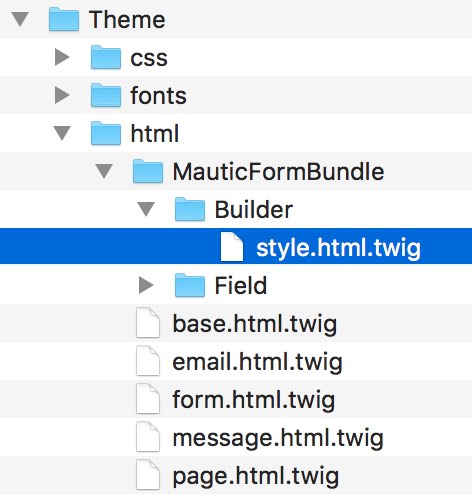
Add/edit any CSS style that you want included in every form under this theme.
<style type="text/css" scoped>
 * {
  -webkit-font-smoothing: antialiased!important;
  font-smoothing: antialiased!important;
  -moz-box-sizing: border-box!important;
 }
</style>
Congratulations! The form feature is now ready to be used in your theme.
Uploading Your Theme to Mautic
Select every top-level file and sub-folder directly within your theme folder. Do not select the theme folder itself.
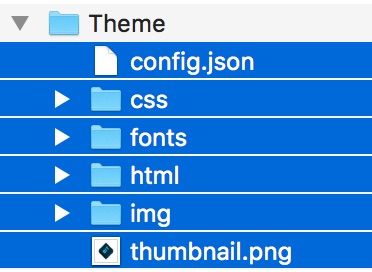
Compress your selection into a .ZIP file, and rename it to something unique.
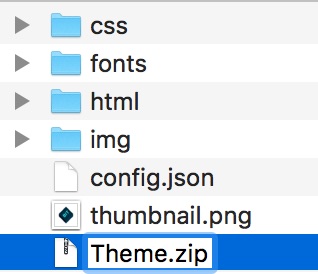
Upload your .ZIP file into the theme uploader in the "themes" section of your Mautic platform.

You have just created a theme!